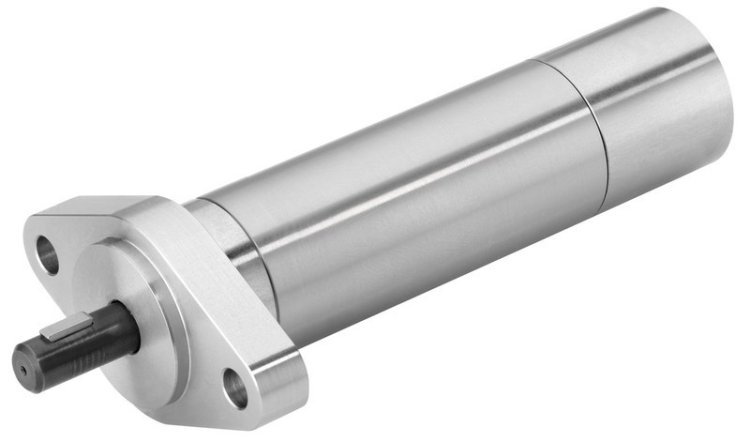
DIY Project: Building Your Own Simple Air Motor:
Air motors offer a fascinating glimpse into the world of alternative power sources. Unlike their electric counterparts, air motors utilize compressed air for rotation. They are known for their simplicity, safety, and eco-friendly operation. If you're looking for a fun and educational project, building your own simple air motor is a great way to explore these concepts firsthand.

Understanding Air Motors:
Air motors function based on the principle of pressurized air creating a force that drives rotation. Compressed air enters the motor housing and pushes against angled blades or vanes, causing the shaft to spin. The design can vary, but the core concept remains the same – converting the energy of compressed air into rotational motion.
There are different types of air motors, each with its own unique design and characteristics. However, for this project, we'll be focusing on a straightforward design known as a pinwheel air motor.
Materials Needed:
To build your own simple air motor, you'll need the following materials:
Tin can (aluminum soda can works well)
Straw (bendy straw preferred)
Cardboard (cereal box or similar)
Skewer or nail
Hot glue gun with glue sticks
Scissors or utility knife (adult supervision required)
Pliers (optional)
Masking tape (optional)
Compressed air source (bike pump, air compressor, etc.)
Safety Note: When using sharp objects like scissors or a utility knife, adult supervision is crucial.
Building the Air Motor:
Can Preparation:
Begin by washing and drying the empty tin can. Carefully remove the top lid of the can using scissors or a utility knife (with adult supervision). Smooth any rough edges with sandpaper (optional).
Straw Modification:
Using scissors or pliers (optional), carefully cut one end of the straw at an angle. The angled cut will act as a small propeller blade for the air motor.
Cardboard Pinwheel:
On a piece of cardboard, draw a circle slightly smaller than the diameter of the can opening. Cut out the circle. Divide the circle into four equal sections, marking these sections with a pencil. Carefully cut along these lines, creating four triangular flaps.
Shaping the Blades:
Bend each of the four triangular flaps on the cardboard circle upwards at a slight angle (around 45 degrees). These bent flaps will become the blades of your pinwheel.
Attaching the Pinwheel:
Carefully insert the straw (angled end first) through the center of the cardboard pinwheel. Secure the straw in place by applying a small amount of hot glue around the base where it enters the cardboard.
Motor Shaft:
Push the other end of the straw through the center of the can lid. If the fit is loose, use masking tape to create a tighter seal around the straw where it enters the lid.
Attaching the Pinwheel:
Carefully push the cardboard pinwheel (with the attached straw) into the open end of the can. Ensure the straw protrudes through the can bottom, creating a shaft for rotation.
Securing the Assembly:
Apply hot glue around the rim of the can where the cardboard pinwheel meets the can body. This will firmly secure the pinwheel assembly inside the can.
Skewer Axle (Optional):
For added stability, you can insert a skewer or nail through the center of the straw, both inside the can and extending out a short distance beyond the bottom of the can. This will act as a fixed axle for the motor shaft.
Finishing Touches:
Allow the glue to dry completely. You can decorate your air motor with paint or markers for a personal touch (optional).
Powering Up Your Air Motor:
Once your air motor is complete, it's time to bring it to life! Here's how to power it up:
Compressed Air Source:
Locate your compressed air source, such as a bike pump or air compressor.
Connecting the Air:
Carefully insert the nozzle of your air source onto the open end of the straw protruding from the bottom of the can.
Air Blast:
With a short burst of air, your air motor should spin! The compressed air entering the can will push against the angled blades of the cardboard pinwheel, causing it to rotate and drive the motor shaft.
Safety Note:
When using compressed air, ensure the pressure is moderate and avoid directing the air blast at yourself or others.
Experiment and Explore (continued):
Adjust the Blade Angle:
Try bending the blades of your cardboard pinwheel at different angles. Observe how this affects the speed and rotation of the motor. A steeper blade angle will generally lead to a faster spin, but with less torque.
Experiment with Materials:
While cardboard works well for a basic design, consider building additional motors using alternative materials for the pinwheel, such as thin plastic sheets or lightweight wood.
Compressed Air Flow:
Test how the pressure and duration of the air blast affect the motor's performance. A stronger and longer air blast will typically result in faster rotation but may also shorten the spin duration.
Adding Propulsion (Optional):
For an even more engaging project, attach a lightweight propeller to the motor shaft (using tape or a small zip tie). This can transform your air motor into a simple air-powered toy car or boat!
Safety Note:
When experimenting with propellers, ensure they are well-balanced and securely attached to avoid wobbling or flying off during operation.
Final Thoughts:
By building and experimenting with your own air motor, you've gained valuable insights into the principles of compressed air power. This project not only provides a fun and educational experience but also lays the groundwork for understanding more complex air motor designs and applications. So, keep exploring, keep experimenting, and have fun with the world of air motors.
What's Your Reaction?


![Wireless Connectivity Software Market Size, Share | Statistics [2032]](https://handyclassified.com/uploads/images/202404/image_100x75_661f3be896033.jpg)


