From Drab to Fab: Spraying Kitchen Cabinets for a Modern Update
From Drab to Fab: Spraying Kitchen Cabinets for a Modern Update - Discover how to transform your kitchen with a fresh, modern look by spraying your cabinets.
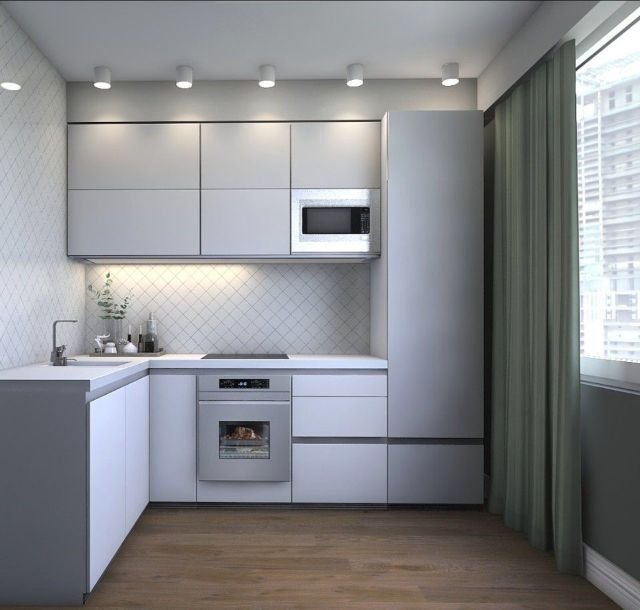
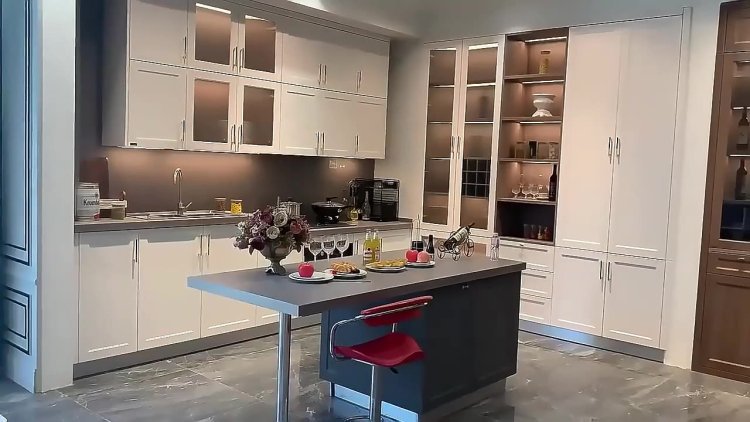
In the ever-evolving world of home design, the kitchen remains a focal point of style and functionality. For many homeowners, transforming a dated kitchen into a modern masterpiece is a top priority. One of the most impactful and cost-effective ways to achieve this transformation is by spraying kitchen cabinets. This comprehensive guide will take you through the process of turning your drab cabinets into fab, modern elements that breathe new life into your kitchen.

Why Spraying Kitchen Cabinets is a Game-Changer
Spraying kitchen cabinets can dramatically alter the appearance of your kitchen without the expense and hassle of a full renovation. Here are some key benefits
Cost-Effective: Spraying is significantly cheaper than replacing cabinets.
Modern Finish: Achieve a smooth, professional look that hand painting can’t match.
Quick Turnaround: Transform your kitchen in a fraction of the time required for a full remodel.
Customization: Choose from a wide range of colors and finishes to suit your style.
Preparing Your Kitchen Cabinets for Spraying
Cleaning and Degreasing
Before any paint touches your cabinets, thorough cleaning and degreasing are essential. Kitchen cabinets accumulate grease, grime, and food particles over time, which can prevent paint from adhering properly.
Materials Needed: Degreaser, sponge, warm water, dry cloth.
Steps:
Remove all cabinet doors and hardware.
Apply a degreaser to the cabinet surfaces.
Scrub thoroughly with a sponge.
Rinse with warm water and dry thoroughly with a clean cloth.
Sanding and Priming
Sanding and priming create a smooth surface for the paint to adhere to, ensuring a long-lasting finish.
Materials Needed: Sandpaper (120 and 220 grit), primer, sanding block, vacuum cleaner.
Steps:
Sand the cabinet surfaces with 120-grit sandpaper to remove the old finish.
Follow up with 220-grit sandpaper for a smoother surface.
Clean the dust with a vacuum and a damp cloth.
Apply a coat of primer and allow it to dry fully.
Choosing the Right Paint and Equipment
Types of Paint for Cabinets
Choosing the right paint is crucial for durability and appearance.
Acrylic Latex Paint: Water-based, easy to clean, and quick drying.
Oil-Based Paint: Durable and provides a hard finish, but longer drying times.
Chalk Paint: Gives a matte, vintage look and is easy to distress for a shabby-chic style.
Essential Tools and Equipment
Investing in the right tools can make a significant difference in the quality of your finish.
Paint Sprayer: HVLP (High Volume Low Pressure) sprayers are ideal for a smooth finish.
Drop Cloths: To protect floors and countertops.
Painter’s Tape: For masking off areas.
Respirator Mask: Protects from inhaling paint fumes.
Protective Gear: Gloves and goggles.
Step-by-Step Guide to Spraying Your Kitchen Cabinets
Protecting Your Kitchen
Preparation is key to a clean and professional-looking job.
Materials Needed: Drop cloths, painter’s tape, plastic sheeting.
Steps:
- Protect floors, countertops, and appliances with drop cloths.
- Use painter’s tape to mask off areas around the cabinets.
- Seal off the kitchen with plastic sheeting to contain paint overspray.
Applying Primer
Priming ensures better paint adhesion and durability.
Materials Needed: Primer, paint sprayer.
Steps:
Pour primer into the paint sprayer.
Apply a thin, even coat of primer to the cabinet surfaces.
Let it dry completely before proceeding.
Spraying the Paint
Spraying provides a smooth, even finish that’s hard to achieve with a brush.
Materials Needed: Chosen paint, paint sprayer.
Steps:
Pour paint into the sprayer.
Apply a light, even coat of paint.
Allow the first coat to dry completely.
Apply a second coat for full coverage.
Finishing Touches
The finishing touches can make all the difference in the final look.
Materials Needed: Clear coat (optional), new hardware (optional).
Steps:
Once the paint is dry, apply a clear coat for extra durability (if desired).
Reattach the cabinet doors and hardware.
Consider updating hardware for a fresh, modern look.
Tips and Tricks for a Professional Finish
Test First: Always test your paint sprayer on a piece of cardboard to ensure the settings are correct.
Thin Coats: Apply multiple thin coats of paint rather than one thick coat to avoid drips and uneven coverage.
Ventilation: Ensure your workspace is well-ventilated to speed up drying times and reduce fumes.
Patience: Allow ample drying time between coats to ensure a smooth, durable finish.
Maintaining Your Newly Sprayed Cabinets
Proper maintenance will keep your cabinets looking fresh and new for years to come.
Regular Cleaning: Wipe down cabinets with a soft, damp cloth regularly to remove dust and grime.
Avoid Harsh Chemicals: Use mild cleaners to avoid damaging the paint.
Touch-Ups: Keep a small amount of paint on hand for quick touch-ups if needed.
Frequently Asked Questions (FAQs)
Is spraying kitchen cabinets better than painting by hand?
Spraying kitchen cabinets generally provides a smoother, more professional finish than painting by hand. It also tends to be quicker and can achieve more even coverage.
What type of paint is best for kitchen cabinets?
Acrylic latex paint is popular for its durability and ease of use. Oil-based paints provide a harder finish but take longer to dry. Chalk paint is good for a matte, vintage look.
How long does it take to spray kitchen cabinets?
The entire process, including preparation and drying times, can take several days to a week, depending on the size of your kitchen and the drying times between coats.
Can I spray kitchen cabinets myself, or should I hire a professional?
While many homeowners successfully spray their own cabinets, hiring a professional can ensure the best possible finish, especially if you are inexperienced with paint sprayers.
How do I prevent paint drips when spraying cabinets?
Apply multiple thin coats of paint rather than one thick coat. This helps prevent drips and ensures a smooth, even finish.
Conclusion
Transforming your kitchen from drab to fab doesn’t have to involve a complete overhaul. Spraying your kitchen cabinets is an effective way to modernize and rejuvenate your space. By following this comprehensive guide, you can achieve professional-looking results that breathe new life into your kitchen. Whether you choose to tackle the project yourself or hire a professional, the outcome will be a stunning, modern kitchen that you’ll love for years to come. For more information and professional services, visit Spraying Kitchen Cupboards.
What's Your Reaction?


![Flake Silver Powder Market Size, Share, Growth and Indstry Analysis [2032]](https://handyclassified.com/uploads/images/202404/image_650x433_661f40ccb8727.jpg)
![Wireless Connectivity Software Market Size, Share | Statistics [2032]](https://handyclassified.com/uploads/images/202404/image_100x75_661f3be896033.jpg)


