How do I Add an OLM File to my Mac Mail?
Get OLM to MBOX Converter to add an OLM file to my Mac Mail with emails and attachments Accurately
Did you recently move to a new Mac system with OLM files? Configured Mac Mail on the same and thus wondering how do I add an OLM file to my Mac Mail with accurate emails and attachments? Searching for a simplified and trouble-free solution for the same? No worries, because in the write-up we have introduced a perfect way that will successfully import OLM to Apple Mail on Mac by converting OLM to MBOX. Let us understand the process more clearly by taking help of a query that several Mac users encounter when they shift to a new Mac OS that has been set up with an Apple Mail account.
Common Query:
I have updated my Mac operating system that requires the formatting of the entire data. However, I have taken the backup of some of my crucial OLM files that was archived from Outlook for Mac account. After upgraded to new Mac OS, I didn’t configure Outlook on the same, I have created an account in Apple Mail which was already present on the system. Now, I need to add an OLM file to my new Mac Mail account that requires the conversion of OLM to MBOX. I am not sure about any solution that can help me adding OLM files to Mac Mail. If anyone is aware of any method, please let me know!
Apple Mail is a widely used email client application that is default on most of the Mac-based platform. It has always been a reliable platform to manage day-to-day emails across variety of services but with time, Apple has added more helpful features. The recent updates in Apple Mail from past few years offered new formatting options, provides the ability to include scans and other attachments.
Just like Apple Mail, Outlook for Mac is another email management platform for Mac users and has exactly the same functioning as Windows Outlook. That is why; it is a first choice for several Mac users.
Still, many users configure Apple Mail because it is free to use and always available on the Mac devices. Because, Apple keeps updating Mac operating system from time-to-time. So, Mac users also have to walk simultaneously with the company. They also upgrade the operating system which requires the clearance of the entire data, utilities, and other items stored on their Mac machine. Therefore, after installing new Mac OS, instead of configuring Outlook again, they prefer Apple Mail because it is easy-to-setup and use.
The only challenge is Apple Mail only supports MBOX format. In other words, the email client will only accept MBOX files. Users need to convert OLM to MBOX to add OLM file to Mac Mail. OLM is an archive file of Outlook for Mac that stores the data items of users account such as emails, contacts, calendars, and more.
How do I Add an OLM File to my Mac Mail?
The quick and effective way to add an OLM file to Mac Mail is MacMister OLM Converter for Mac application. The software is friendly, cost-effective, and irreplaceable. Anyone can manage the entire task on their own and precisely add OLM files to Mac Mail with accurate emails and attachments. Even, the simplified operational steps will take minimum time of users’ that help them to finish the conversion quickly and precisely.
Moreover, there are list of exceptional features available with the help of users can add an OLM file to Mac Mail according to their requirements. One can download the freeware version right away and test the working steps of the tool for free.
Working Steps to Add an OLM File to Mac Mail on Mac
Step 1. Download and run the solution on Mac-based system.
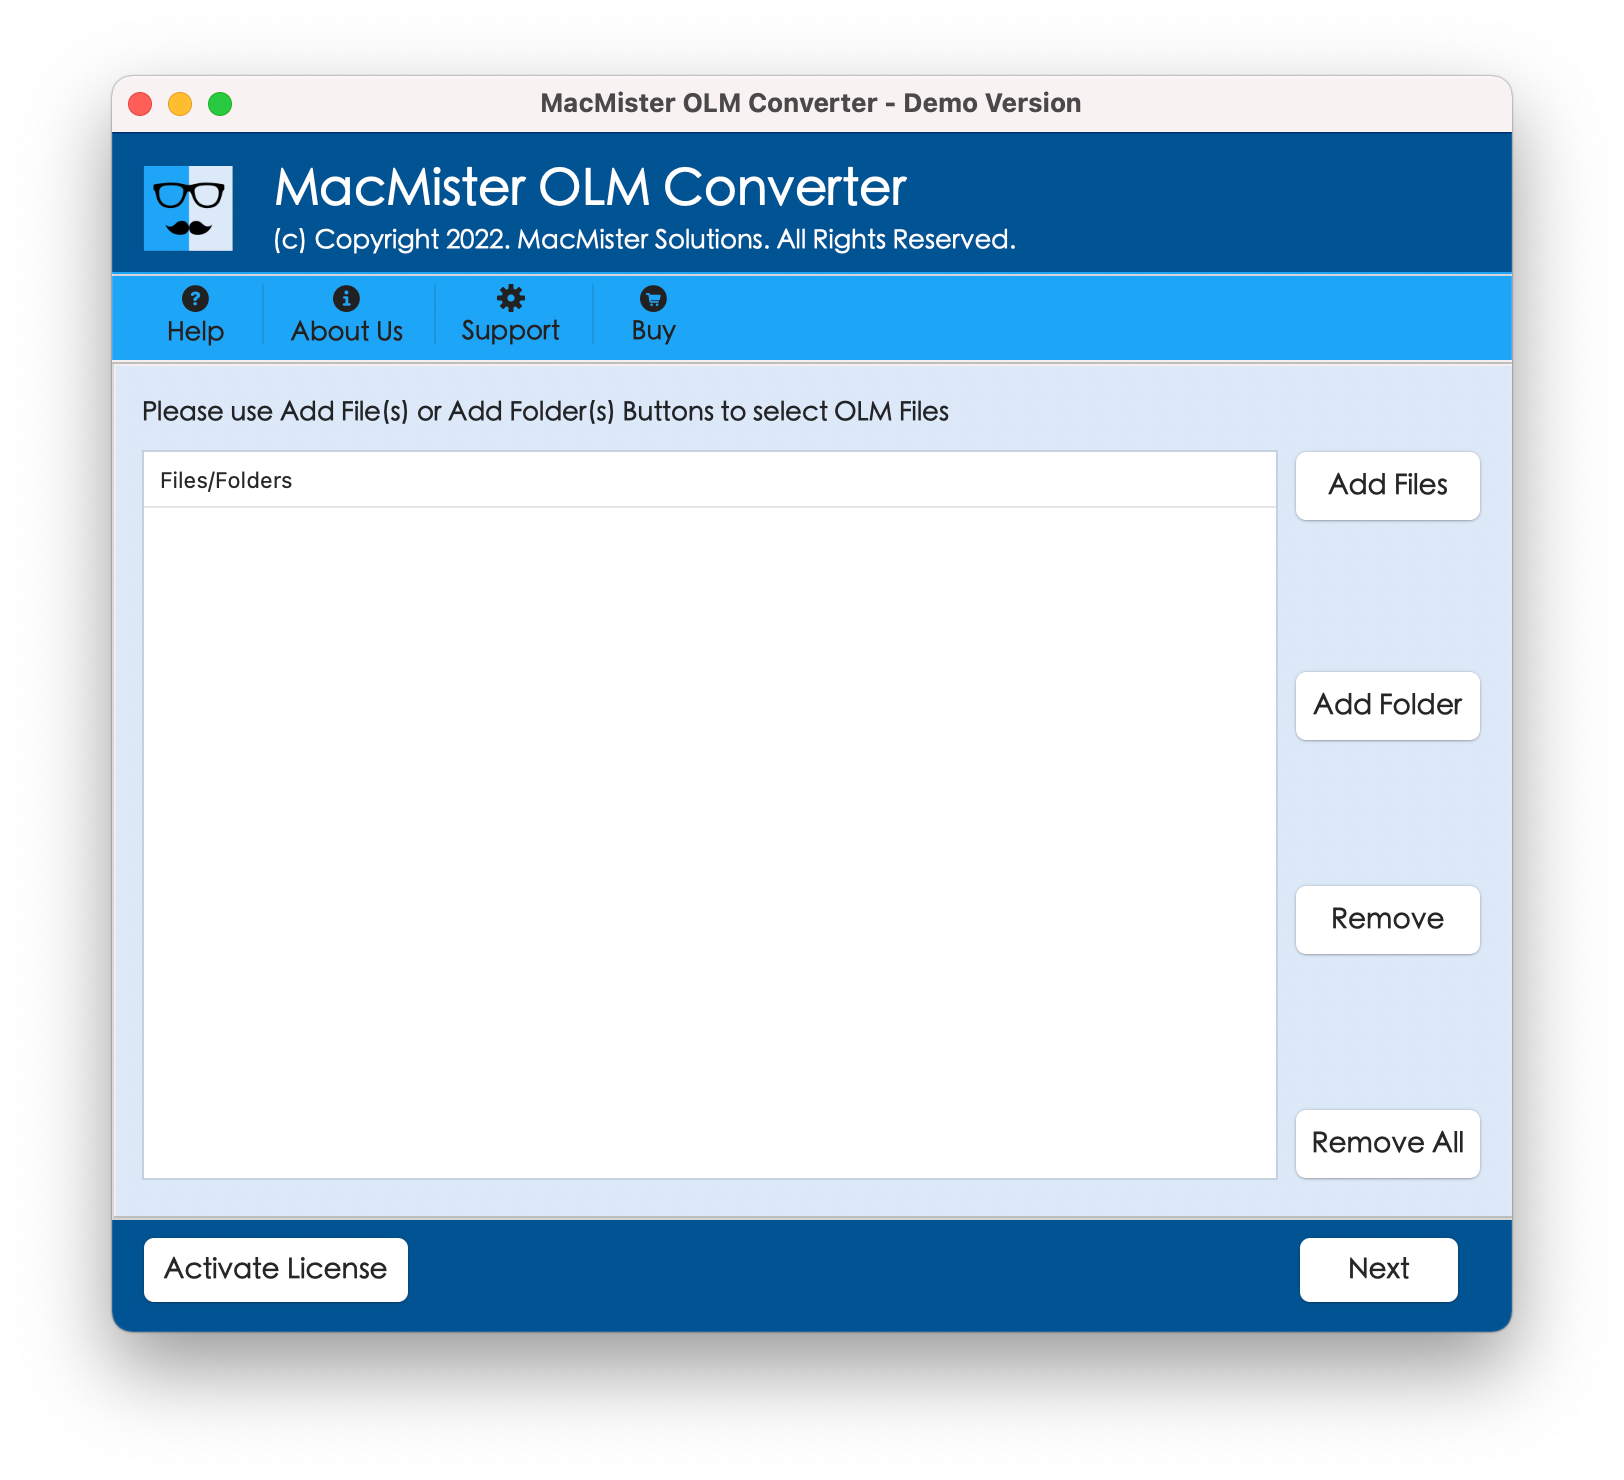
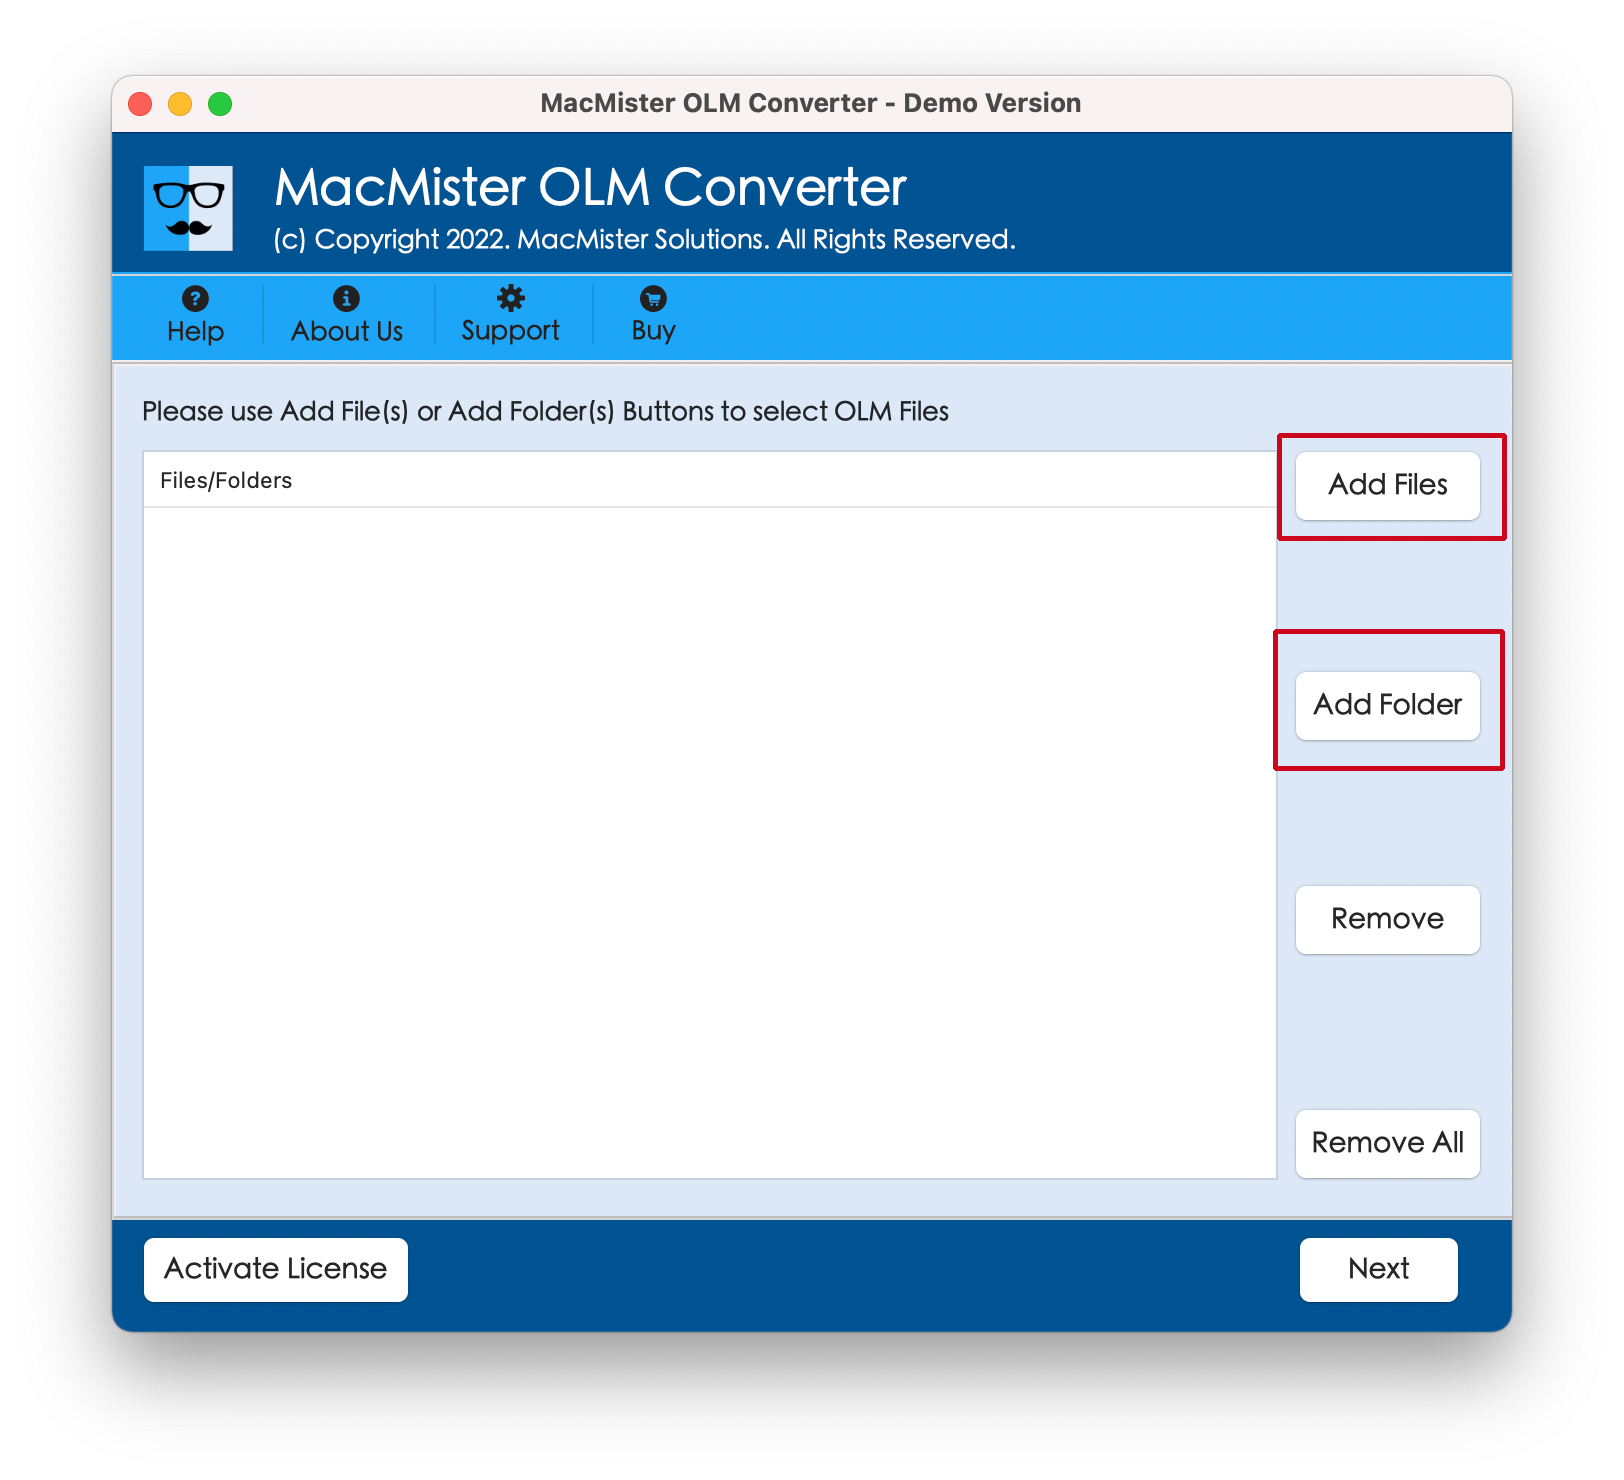
Step 2. Add OLM files by using Add File(s) option or make use of Add Folder option to add a folder having multiple OLM files on the software. Click Next.
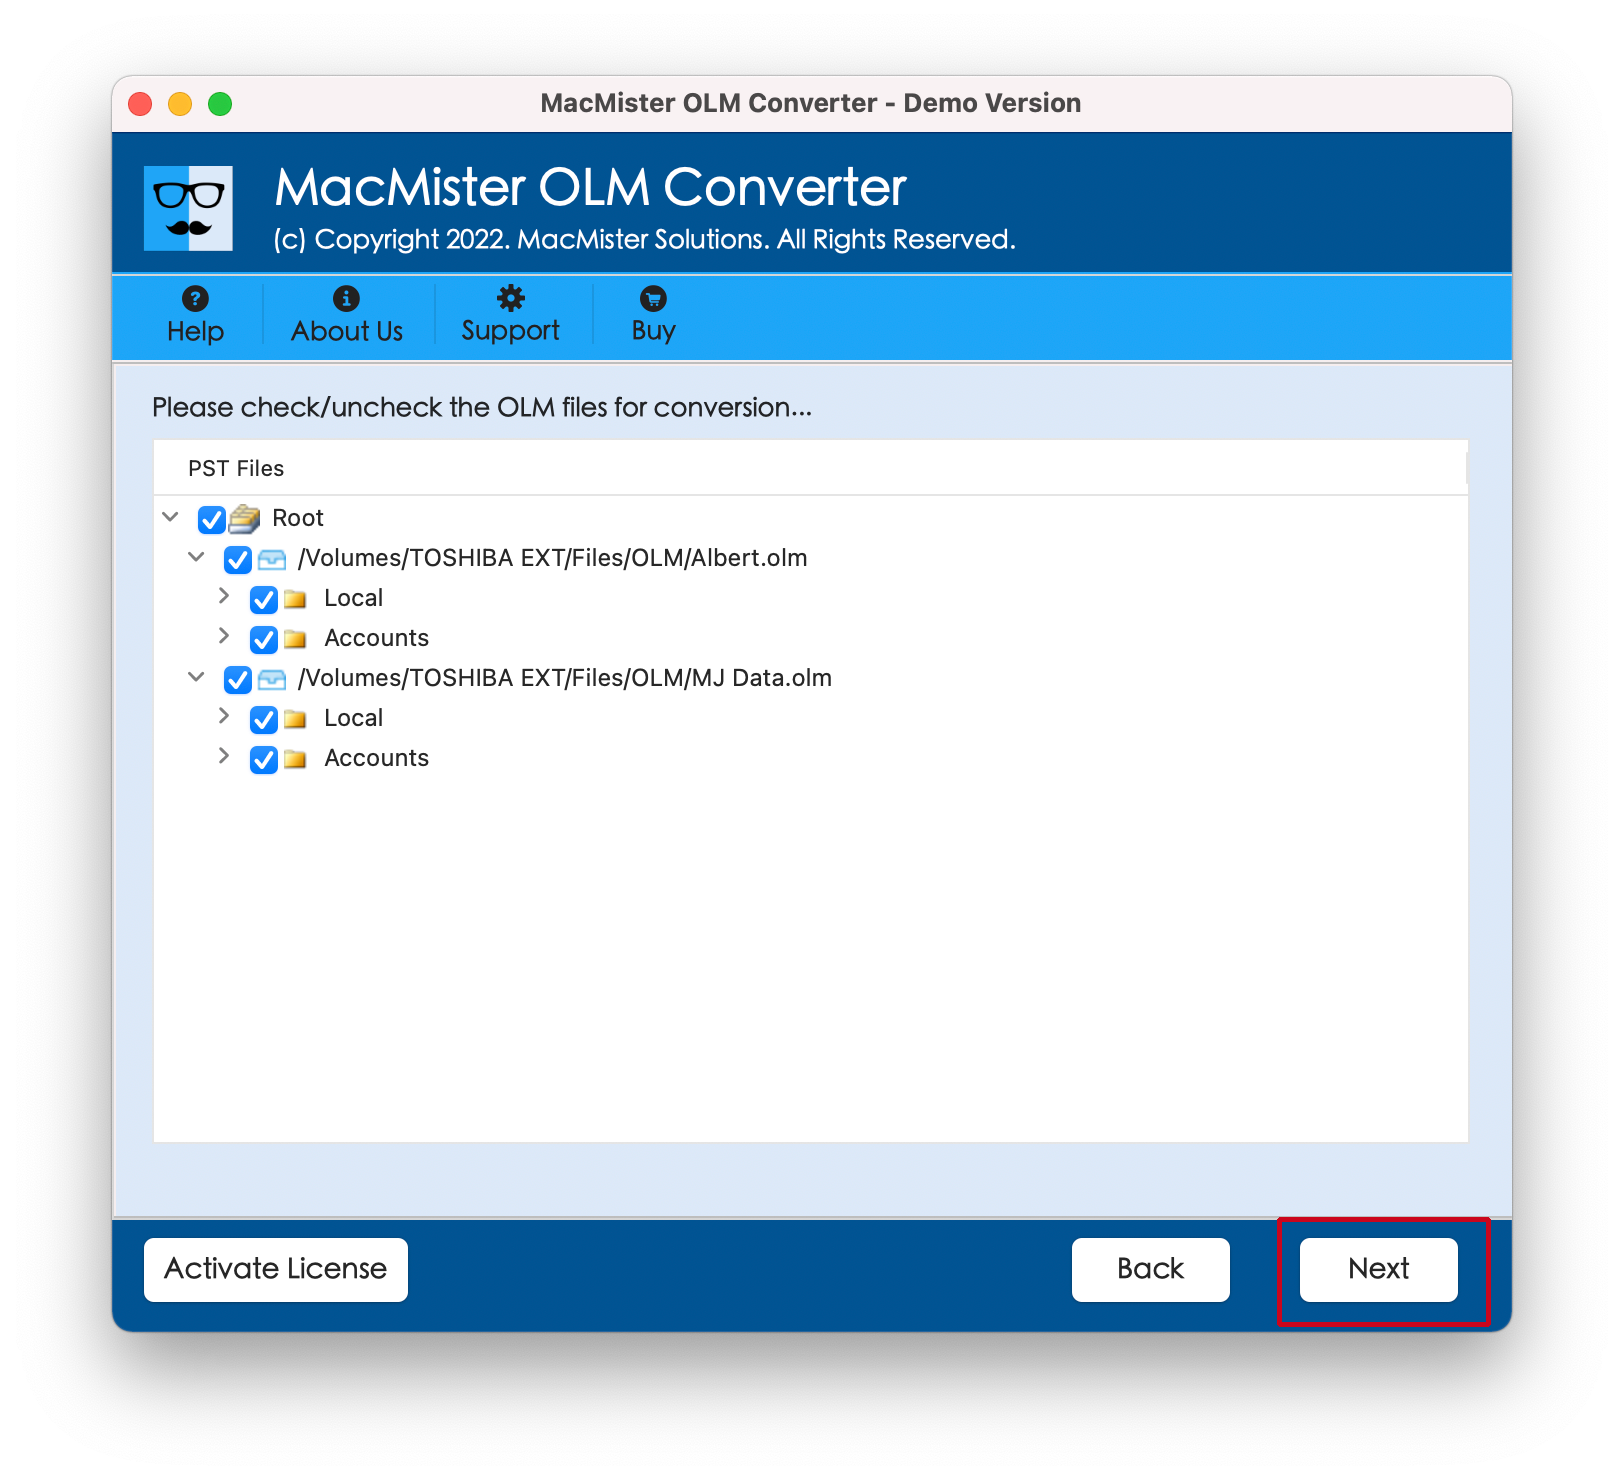
Step 3. The application will immediately show the list of OLM files with selected checkboxes one-by-one. Verify them and click Next.
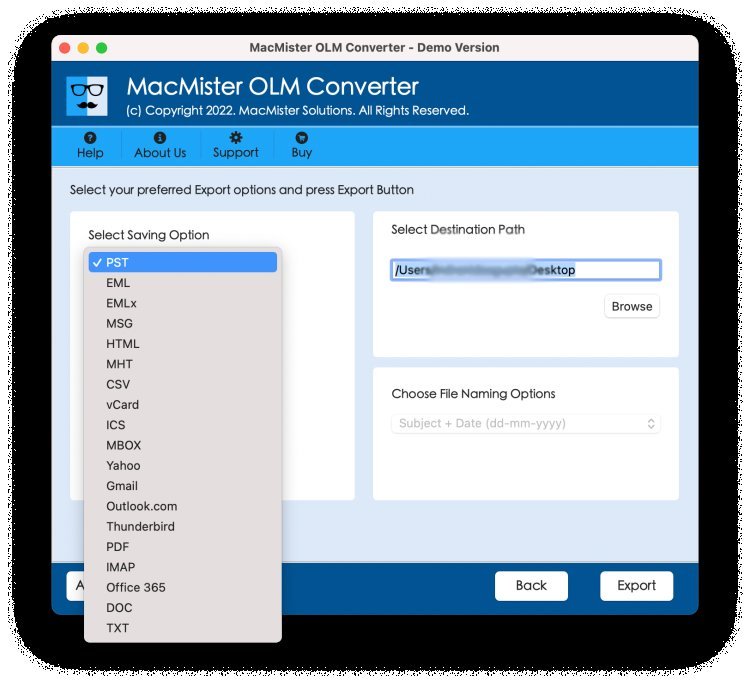
Step 4. Tap Select Saving Options and go with MBOX format from the list.
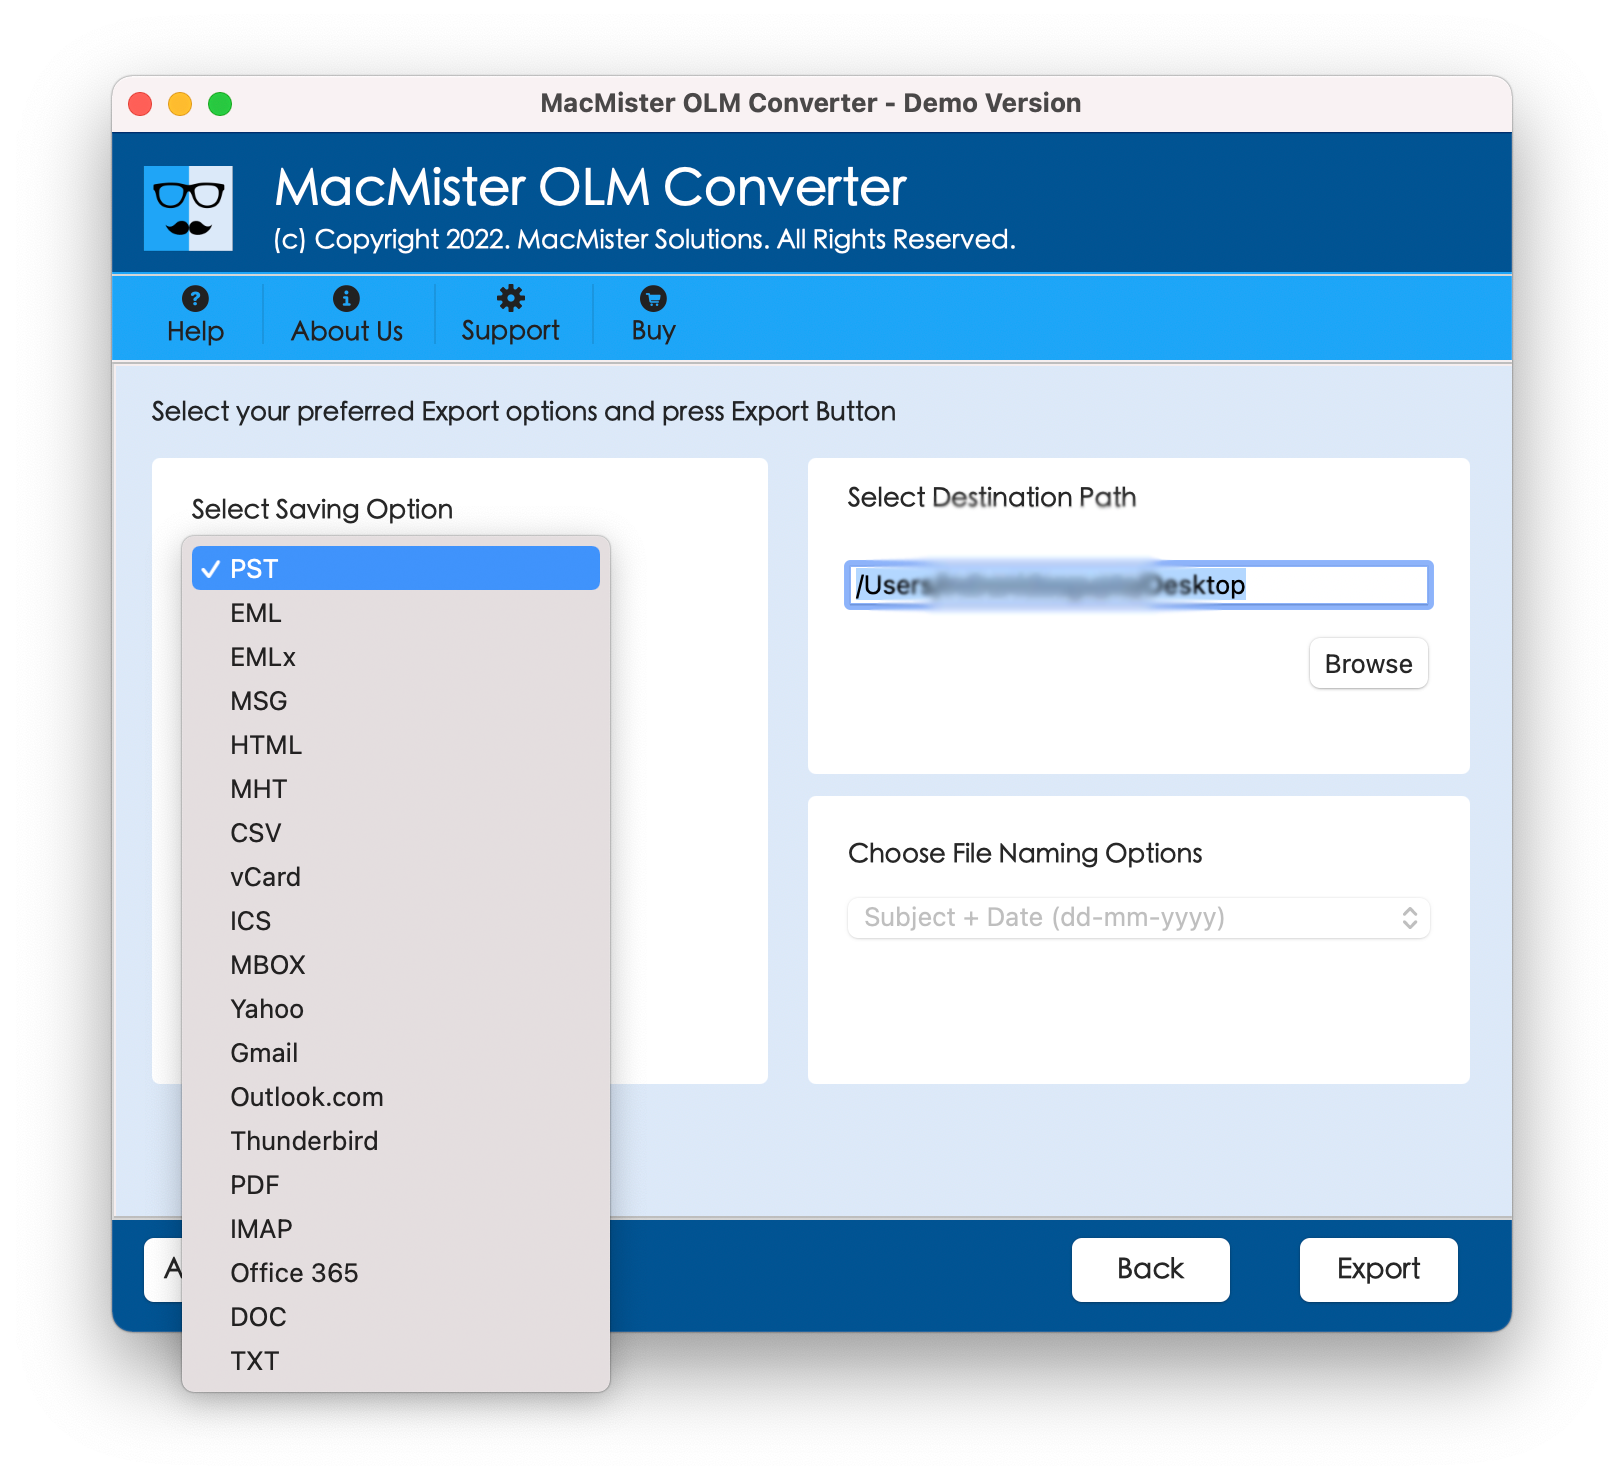
Step 5. Apply the options appearing under MBOX as per requirements and click Export button.
Step 6. The conversion will appear on Live Conversion Report window which allows to track the current conversion status of OLM files.
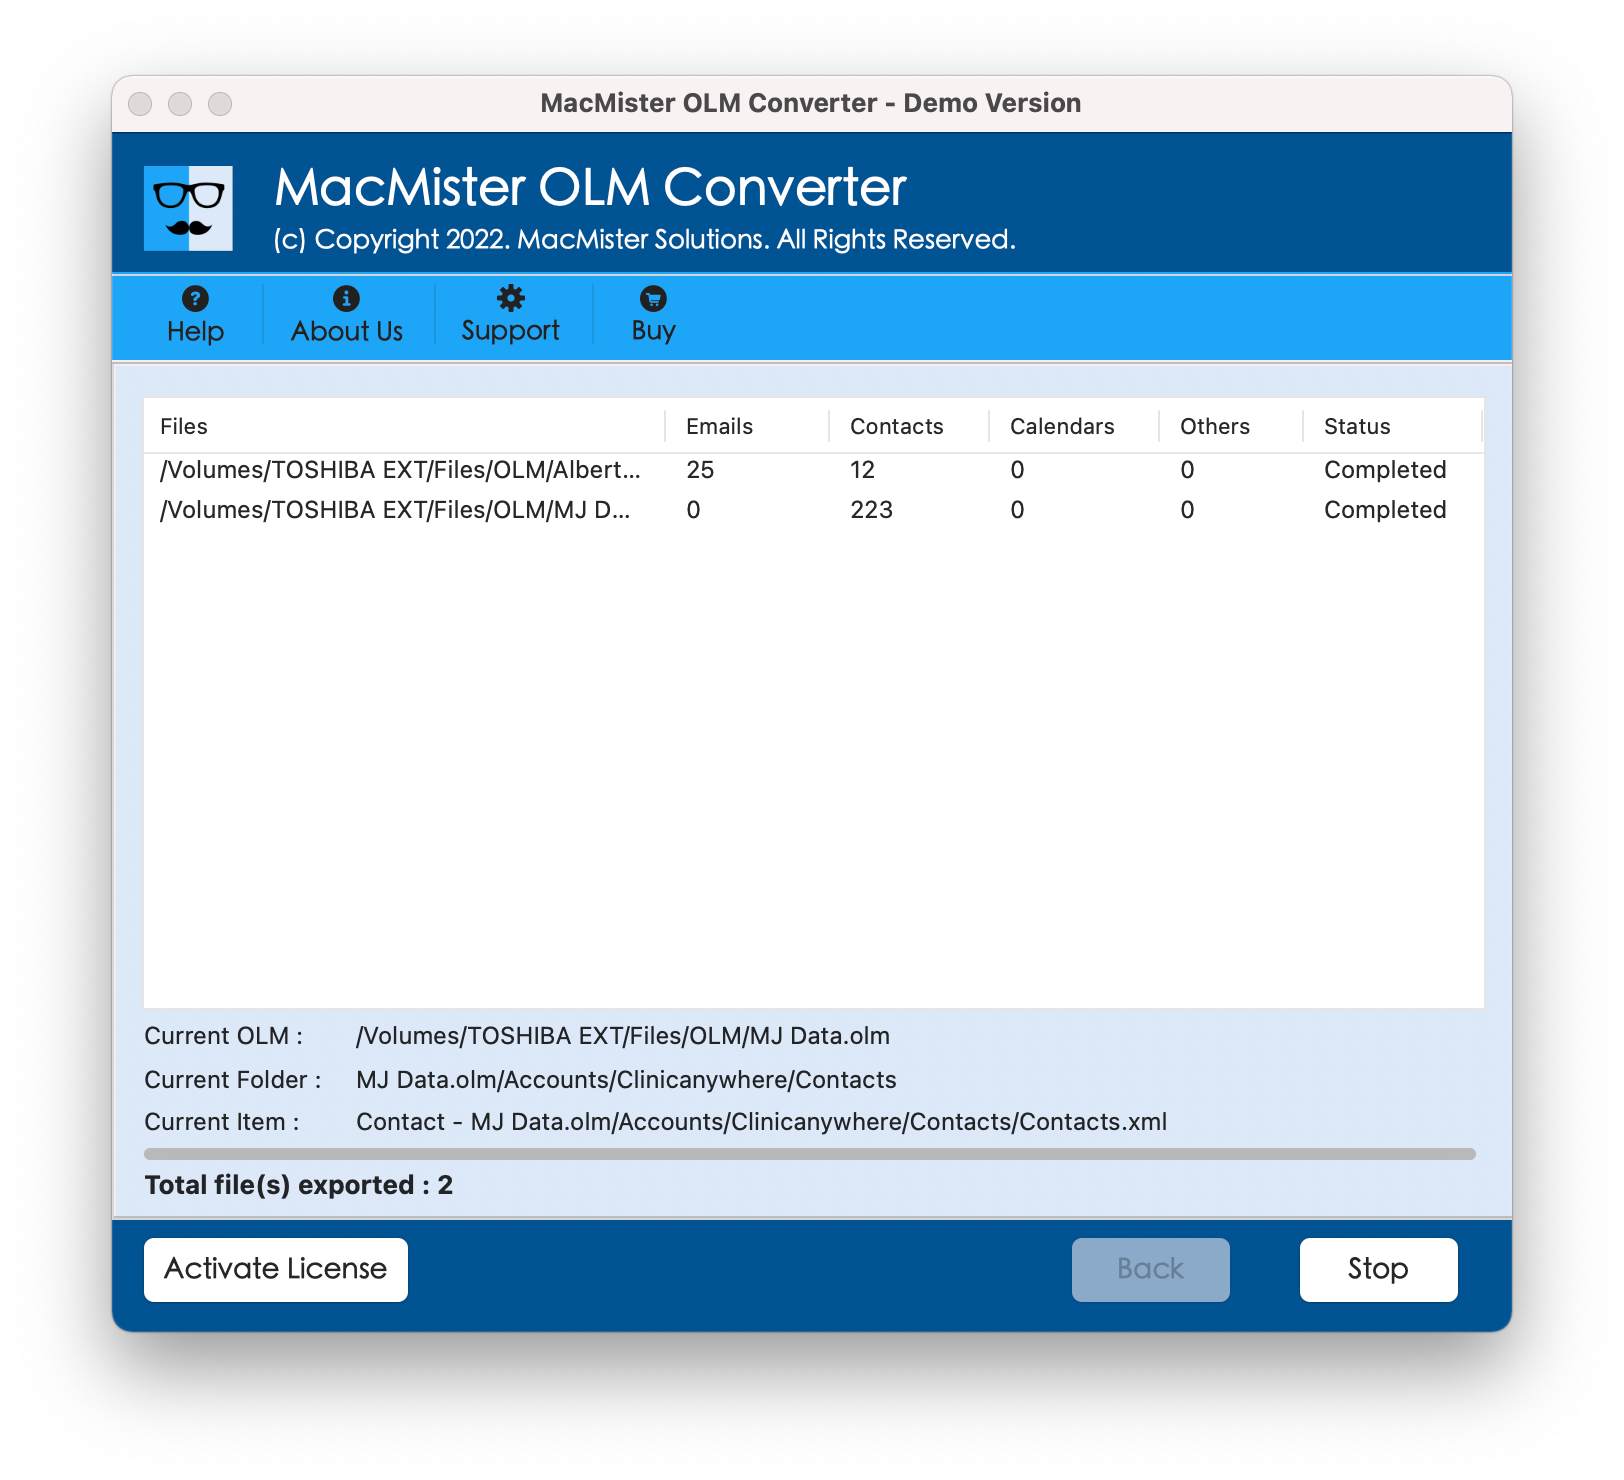
In few seconds, the process finishes and the tool will show “Conversion Completed” message which confirms that the app has successfully completed the conversion process. Click OK and open Apple Mail account to add resultant files.
Guide to Add Resultant Files in Apple Mail Email Account
Step 1. Run Apple Mail on your Mac.
Step 2. Click File and select Import Mailboxes…
Step 3. Pick Files in MBOX format option and tap Continue.
Step 4. Go to location where resultant files are saved to select them and click Choose.
Step 5. The import process will go live that finishes in few seconds. Hit the Done button to close the screen.
The Apple Mail email account window will appear. The resultant files are added on the left navigation pane under On My Mac. The new Import folder will appear with the sub-folder of Inbox. However, one can click on the same to list all its email messages on the screen. Choose the desired email message to check the result. It will appear with accurate content and formatting properties.
Conclusion
The write-up here offered an incomparable way to fix “how do I add an OLM file to my Mac Mail”. MacMister OLM Converter for Mac is surely a must try application as it performs the conversion smoothly and ensures the accurate outcome of each and every email. Anyone can utilize the app without any difficulties and add an OLM file to Mac Mail precisely. Besides MBOX, it allows to add an OLM file into 15+ more options. Download its free demo now and add first 25 OLM emails and attachments to Mac Mail free of cost.
What's Your Reaction?


![Wireless Connectivity Software Market Size, Share | Statistics [2032]](https://handyclassified.com/uploads/images/202404/image_100x75_661f3be896033.jpg)


